This is the second article about the new HubTile control from the latest release of Windows Phone Toolkit – August 2011 (7.1 SDK). This time I am going to talk about data binding and using HubTile in more complex scenarios.
NOTE: In Part1 we talked about key properties, methods, events and the main features of the Windows Phone HubTile control. You can take a look at it for reference.
- Windows Phone HubTile in depth| Part1: key concepts and API
- Windows Phone HubTile in depth| Part2: Data Binding
- Windows Phone HubTile in depth| Part3: Freezing and Unfreezing tiles
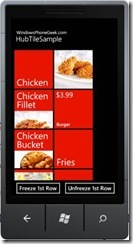
Here is how the final data binding example should look like:
To begin with lets first create a new Windows Phone 7.1 application project and add a reference to the Microsoft.Phone.Controls.Toolkit.dll assembly in your Windows Phone application project.
NOTE: The Microsoft.Phone.Controls.Toolkit.dll assembly is installed with the toolkit and you can find it in:
For 32-bit systems:
C:Program FilesMicrosoft SDKsWindows Phonev7.1ToolkitAug11BinMicrosoft.Phone.Controls.Toolkit.dll
For 64-bit systems:
C:Program Files (x86)Microsoft SDKsWindows Phonev7.1ToolkitAug11BinMicrosoft.Phone.Controls.Toolkit.dll
Alternatively you can select it directly from the “…Silverlight for Windows Phone Toolkit Source & Sample – Aug 2011Bin” if you have downloaded the “Silverlight for Windows Phone Toolkit Source & Sample – Aug 2011.zip” instead.
Databinding HubTile Step by Step
This example demonstrates how to populate the HubTile control with data using data binding. We will implement a sample animated menu for a fast food company which shows: Title, Description, Price, etc.
- Defining the Data Source
Step1. Define the business/data class:
The first step is to define the data class. Lets create a “TileItem” class which exposes the following properties:
public class TileItem
{
    public string ImageUri
    {
        get;
        set;
    }
    public string Title
    {
        get;
        set;
    }
    public string Notification
    {
        get;
        set;
    }
    public bool DisplayNotification
    {
        get
        {
            return !string.IsNullOrEmpty(this.Notification);
        }
    }
    public string Message
    {
        get;
        set;
    }
    public string GroupTag
    {
        get;
        set;
    }
}
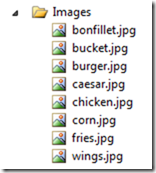
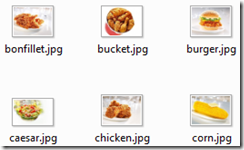
Step2. Create a new Images folder and add some images which will be shown in the HubTiles:
Step3. Create a sample collection with items of type TileItem:
public MainPage()
{
    InitializeComponent();
    List<TileItem> tileItems = new List<TileItem>()
    {
        new TileItem() {
            ImageUri ="/Images/chicken.jpg",
            Title = "Chicken", Notification = "$3.49", GroupTag = "TileGroup"
        },
        new TileItem() {
            ImageUri ="/Images/wings.jpg",
            Title = "Wings", Notification = "Only $2.49", GroupTag = "TileGroup"
        },
        new TileItem() {
            ImageUri = "/Images/bonfillet.jpg",
            Title = "ChickennFillet",
            Message = "A couple of these will not hurt your diet."
        },
        new TileItem() {
            ImageUri = "/Images/burger.jpg",
            Title = "Burger", Notification = "$3.99"
        },
        new TileItem() {
            ImageUri = "/Images/bucket.jpg",
            Title = "ChickennBucket", Notification = "$19.99"
        },
        new TileItem() {
            ImageUri = "/Images/fries.jpg",
            Title = "Fries", Notification = "Only $1.99"
        },
        new TileItem() {
            ImageUri = "/Images/caesar.jpg",
            Title = "Caesar Salad", Notification = "$4.99"
        },
        new TileItem() {
            ImageUri = "/Images/corn.jpg",
            Title = "Corn", Notification = "Only $1.99"
        },
    };
    //...
}
- Databind HubTile
Step1. Define HubTile in XAML
We will add a ListBox which will be used to display a collection of TileItems using a HubTile control for each. The HubTile and its binding to TileItem properties is defined in the the ItemTemplate. We will also change the ItemsPanel of the list box to WrapPanel so that its items will be rendered appropriately. Here is how the code should look like:
<ListBox Grid.Row="0" x:Name="tileList">
    <ListBox.ItemsPanel>
        <ItemsPanelTemplate>
            <toolkit:WrapPanel Orientation="Horizontal" />
        </ItemsPanelTemplate>
    </ListBox.ItemsPanel>
    <ListBox.ItemTemplate>
        <DataTemplate>
            <toolkit:HubTile Title="{Binding Title}" Margin="3"
                             Notification="{Binding Notification}"
                             DisplayNotification="{Binding DisplayNotification}"
                             Message="{Binding Message}"
                             GroupTag="{Binding GroupTag}"
                             Source="{Binding ImageUri}">
            </toolkit:HubTile>
        </DataTemplate>
    </ListBox.ItemTemplate>
</ListBox>
Step2. Populate the ListBox with data through its ItemsSource property:
public MainPage()
{
    InitializeComponent();
    //...
    this.tileList.ItemsSource = tileItems;
}
Step3. Build the project and run it. Here is how the result should look like:
NOTE: The HubTile background color is determined by the PhoneAccentBrush. I.e. if your phone/emulator uses the Red theme, which is the default one in Mango RC, then your tiles will be red.
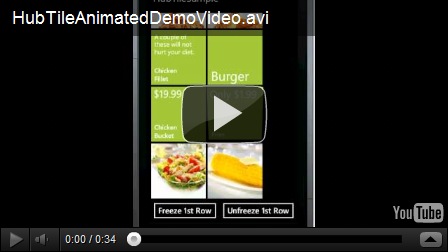
Here is a demo video with the emulator theme changed to green:
That was all about data binding HubTile from the Windows Phone Toolkit – August 2011 (7.1 SDK) in depth. In the next post I will talk about freezing and unfreezing HubTiles, so stay tuned.
The source code is available here:
I hope that the article was helpful.


Pingback:Windows Phone HubTile in depth| Part3: Freezing and Unfreezing tiles » My Virtual Word
Pingback:Windows Phone HubTile in depth| Part1: key concepts and API » My Virtual Word